Overview
In this article, we will discuss how to set up a DAG in Airflow 3.0 that connects to Snowflake,
creates a table, inserts some data, then reads that data back.
For a more advanced, production-ready guide covering service users, least-privilege roles/grants, key-pair
authentication, and loading data via stages and COPY INTO, check out my
advanced guide.
1. Set Up Snowflake
First, we need a Snowflake account and a database to work with.
- Navigate to signup.snowflake.com and sign up for the free trial.
- The free trial provides $400 in credits over 30 days (as of January 2026). See Snowflake's documentation for current terms and limitations.
- Create a new database:
YOUR_DATABASE_NAME - Inside your database, create a schema:
YOUR_SCHEMA_NAME
⚠️ Security Warning
Do not use admin-level accounts to access your data in Snowflake unless you are in a personal sandbox environment. For simplicity, this guide uses the default admin account. The upcoming production-ready guide will cover configuring discrete users, role-based privileges, and specific grants for an Airflow service user.
2. Set Up Airflow Environment
If you already have Airflow configured, feel free to skip to Step 3. For local testing, here's a quick guide to get up and running with Airflow on Docker Compose.
⚠️ Not for Production
You should not deploy Airflow in this manner for production setups. Refer to Airflow's production deployment documentation for proper deployment guidance.
📝 Prerequisites
Instructions are for a Linux-based shell. Windows users can utilize WSL, although this guide was completed on Ubuntu—you may encounter differences. Ports 5555 and 8080 must be available on your host.
Create the Airflow directory structure
Make a new folder for Airflow and navigate into it:
mkdir airflow-demo && cd airflow-demoDownload the Docker Compose file
curl -LfO 'https://airflow.apache.org/docs/apache-airflow/3.1.6/docker-compose.yaml'Create required directories
mkdir -p ./dags ./logs ./plugins ./configSet the Airflow user ID
echo -e "AIRFLOW_UID=$(id -u)" > .env💡 Tip: Disable Example DAGs
If you don't want all the example DAGs cluttering your interface, edit
docker-compose.yaml and change:
AIRFLOW__CORE__LOAD_EXAMPLES: 'true'to:
AIRFLOW__CORE__LOAD_EXAMPLES: 'false'Initialize the database
docker compose up airflow-initStart Airflow
docker compose up
Once running, access the Airflow web interface at
http://127.0.0.1:8080.
The default credentials are airflow / airflow.
3. Configure the Snowflake Connection
Now we need to tell Airflow how to connect to Snowflake.
- In the Airflow UI, navigate to Admin → Connections
- Click Add a new record (the + button)
- Fill out the connection form with your Snowflake details:
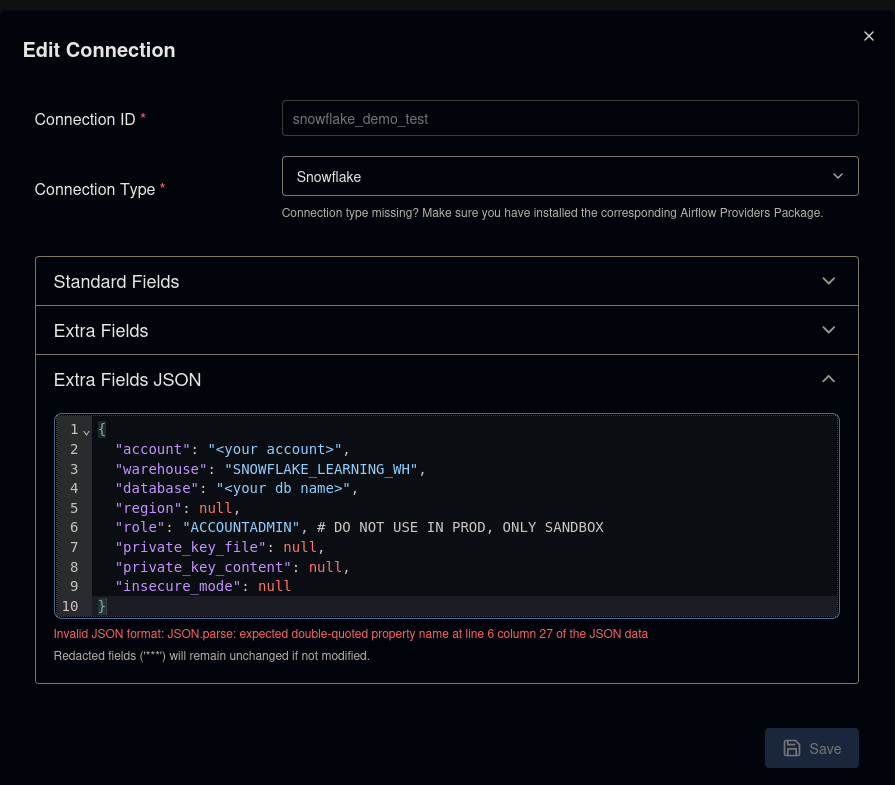
Key fields to configure:
- Connection Id:
snowflake_demo_test(or your preferred name) - Connection Type: Snowflake
- Account: use the account identifier shown in Snowsight → ‘Connect’ (do not paste the full https URL).
- Login: Your Snowflake username
- Password: Your Snowflake password
- Schema:
YOUR_SCHEMA_NAME - Database:
YOUR_DATABASE_NAME - Warehouse: Your compute warehouse name
4. Write the DAG
Create a new directory in the dags folder for your project and add the DAG file:
mkdir -p ./dags/snowflake-demo && cd ./dags/snowflake-demo
touch dag.py
Open dag.py in your favorite editor and add the following code:
# Licensed to the Apache Software Foundation (ASF) under one
# or more contributor license agreements. See the NOTICE file
# distributed with this work for additional information
# regarding copyright ownership. The ASF licenses this file
# to you under the Apache License, Version 2.0 (the
# "License"); you may not use this file except in compliance
# with the License. You may obtain a copy of the License at
#
# http://www.apache.org/licenses/LICENSE-2.0
#
# Unless required by applicable law or agreed to in writing,
# software distributed under the License is distributed on an
# "AS IS" BASIS, WITHOUT WARRANTIES OR CONDITIONS OF ANY
# KIND, either express or implied. See the License for the
# specific language governing permissions and limitations
# under the License.
"""
Simplified Snowflake demo DAG for Airflow tutorials.
Source (Apache-2.0):
https://github.com/apache/airflow/blob/providers-snowflake/6.8.0/providers/snowflake/tests/system/snowflake/example_snowflake.py
Modifications: simplified for readability by Rocky Mountain Tech Lab, 2026-01-15
"""
# Imports
import pendulum
import logging
# Airflow Imports
from airflow.sdk import dag, task
from airflow.providers.common.sql.operators.sql import SQLExecuteQueryOperator
# Constants
SNOWFLAKE_CONN_ID = "snowflake_demo"
SNOWFLAKE_SAMPLE_TABLE = "sample_table"
# ----------------------
# SQL Statements
# ----------------------
# Setup
CREATE_TABLE_SQL = (
f"CREATE OR REPLACE TRANSIENT TABLE {SNOWFLAKE_SAMPLE_TABLE} (name VARCHAR(250), id INT);"
)
# Sample Insert
INSERT_SQL = f"INSERT INTO {SNOWFLAKE_SAMPLE_TABLE} VALUES ('name', %(id)s)"
SQL_LIST = [INSERT_SQL % {"id": n} for n in range(10)] # Inserts 0 through 9
SQL_STATEMENTS_JOINED = "; ".join(SQL_LIST)
# Sample Read
READ_SQL = f"SELECT * FROM {SNOWFLAKE_SAMPLE_TABLE} ORDER BY id LIMIT 10;"
@dag(
'snowflake_sample_dag',
schedule='@once',
start_date=pendulum.datetime(2026, 1, 14, tz='UTC'),
catchup=False,
tags=['snowflake', 'etl'],
)
def push_to_snowflake():
# Task Definitions
create_table = SQLExecuteQueryOperator(
task_id="create_table_on_snowflake",
sql=CREATE_TABLE_SQL,
conn_id=SNOWFLAKE_CONN_ID,
)
insert_multiple_records = SQLExecuteQueryOperator(
task_id="insert_multiple_records_into_snowflake",
sql=SQL_STATEMENTS_JOINED,
conn_id=SNOWFLAKE_CONN_ID,
split_statements=True,
)
read_rows = SQLExecuteQueryOperator(
task_id="read_multiple_records_from_snowflake",
sql=READ_SQL,
conn_id=SNOWFLAKE_CONN_ID,
do_xcom_push=True,
)
@task()
def print_rows(rows):
logging.info("Snowflake rows: %s", rows)
# Task Invocations
create_table >> insert_multiple_records >> read_rows >> print_rows(read_rows.output)
# Dag Invocation
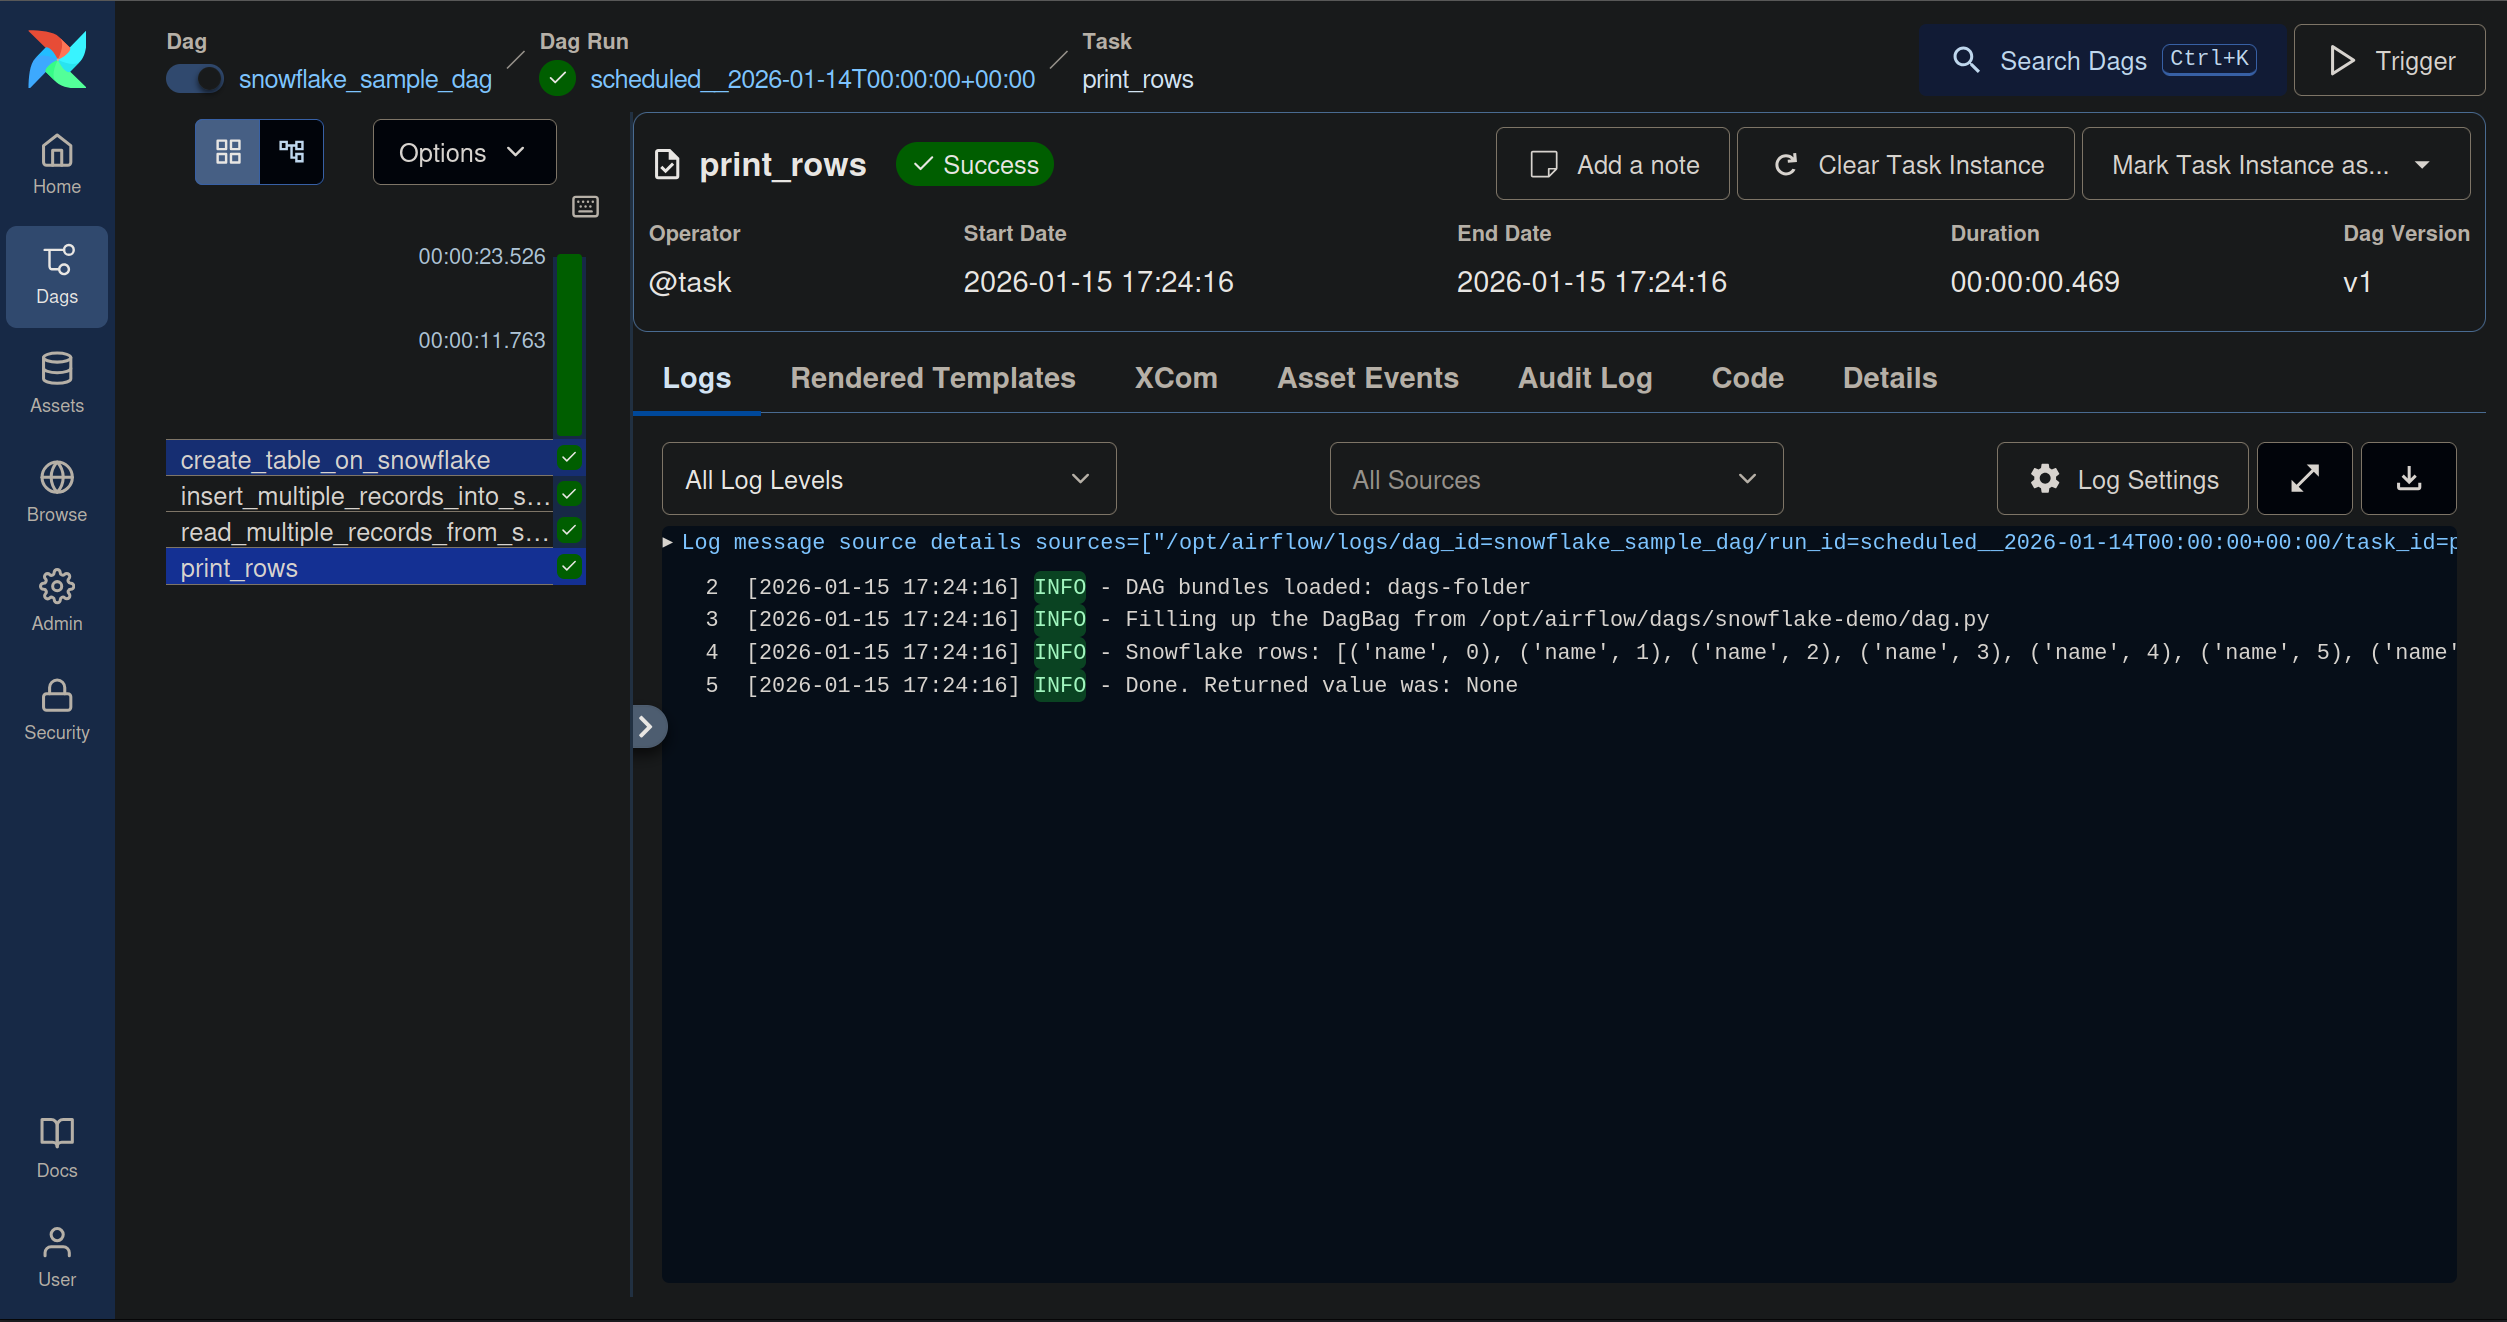
push_to_snowflake()5. Run and Verify
After saving your DAG, Airflow will automatically detect it (this may take a minute). Trigger the DAG manually from the Airflow UI and watch it execute.
Check the Airflow logs
You should see output similar to this in the task logs:
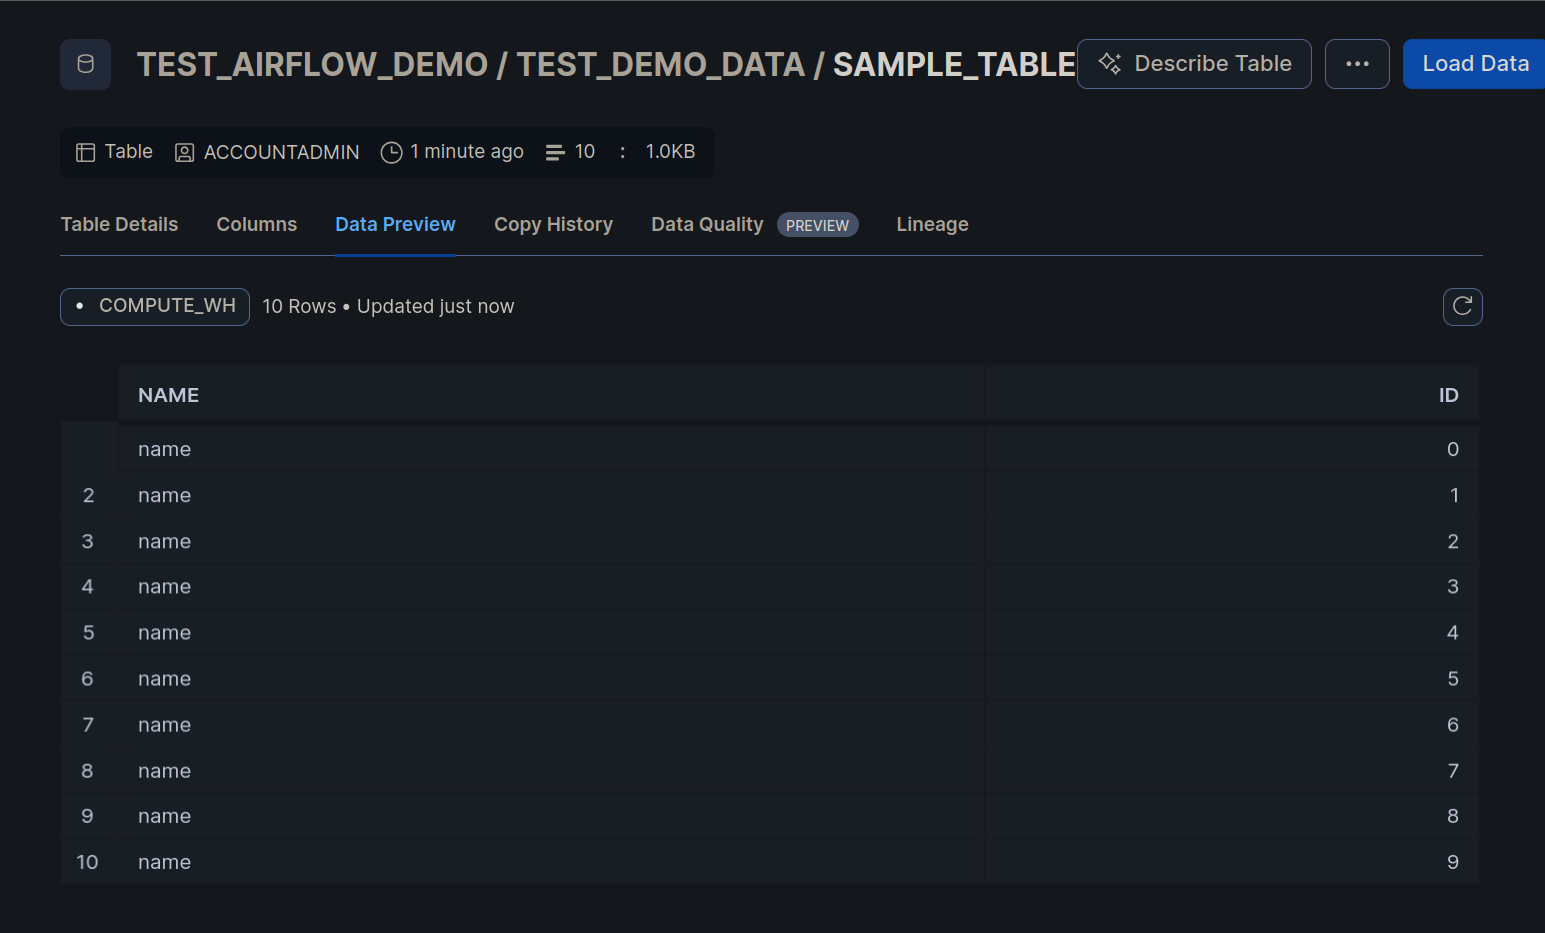
Verify in Snowflake
You can also verify the data directly in the Snowflake console:
Conclusion
That's it! You've successfully connected Airflow to Snowflake and run your first data pipeline. This basic setup is great for learning and experimentation.
The advanced guide covers production-ready practices including:
- Service user configuration with least-privilege roles and grants
- Key-pair authentication instead of password-based auth
- Loading data via Snowflake stages and
COPY INTO
If you have any questions or feedback, please reach out via the contact page.